In an effort to improve security in our IonQ Quantum Cloud product, we are removing the ability to view previously created API key values.
Starting September 22nd, 2023, API key values will only be displayed to you during the creation process. Subsequently, these values will not be accessible or visible again in order to minimize the risk of potential API key exposure. This change will affect both new and existing API keys.
Visit https://cloud.ionq.com/settings/keys to see your current keys.
We recommend that you back your keys up and store them in a secure manner for future use before this change occurs. Additionally, we've provided a guide below with steps for storing keys as local environment variables to make it easier for daily use.
If you need assistance, please submit a ticket on support.ionq.com.
Step one: Generate the API Key
To create an API key for IonQ Quantum Cloud, you must have access to https://cloud.ionq.com/. Log in to your account and you will be directed to the `My Jobs` tab. Navigate to the upper-right corner and click on your profile icon, then choose `API Keys` from the dropdown menu.
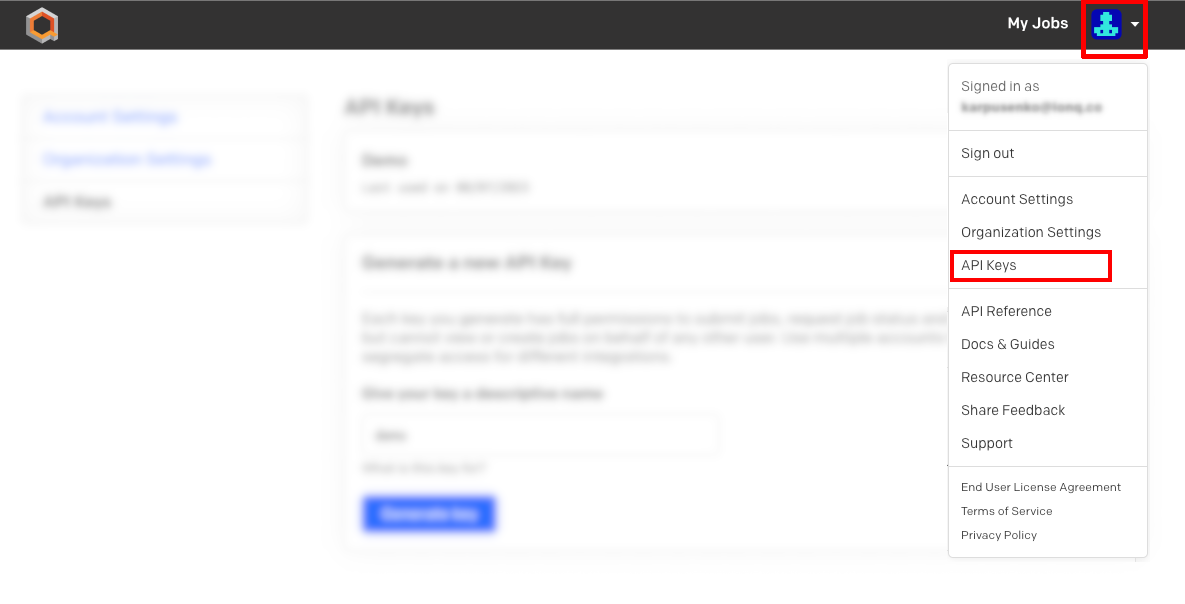
API Keys Menu
Within the 'API Keys' section, a list of previously generated keys will be displayed along with their respective usage timestamps. Additionally, it is possible to revoke access for any of these existing keys directly from this interface.
To create a new API key, navigate to the 'Generate a new API Key' tab. You'll need to provide a descriptive name for your key, which will help you identify what it was for in the future if you need to revoke or rotate the key.
Proceed by clicking the 'Generate key' button.
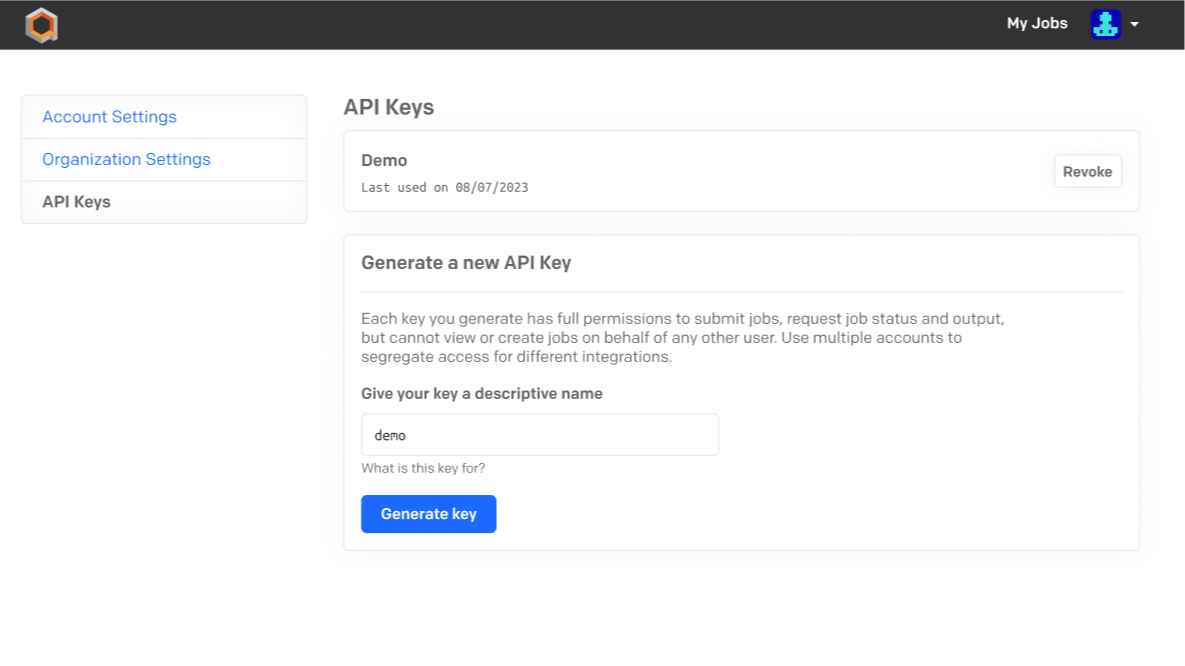
API Keys tab
Once the key is created, you'll be given the option to download the key as a file or copying the key to your computer's clipboard by selecting 'Copy API key'.
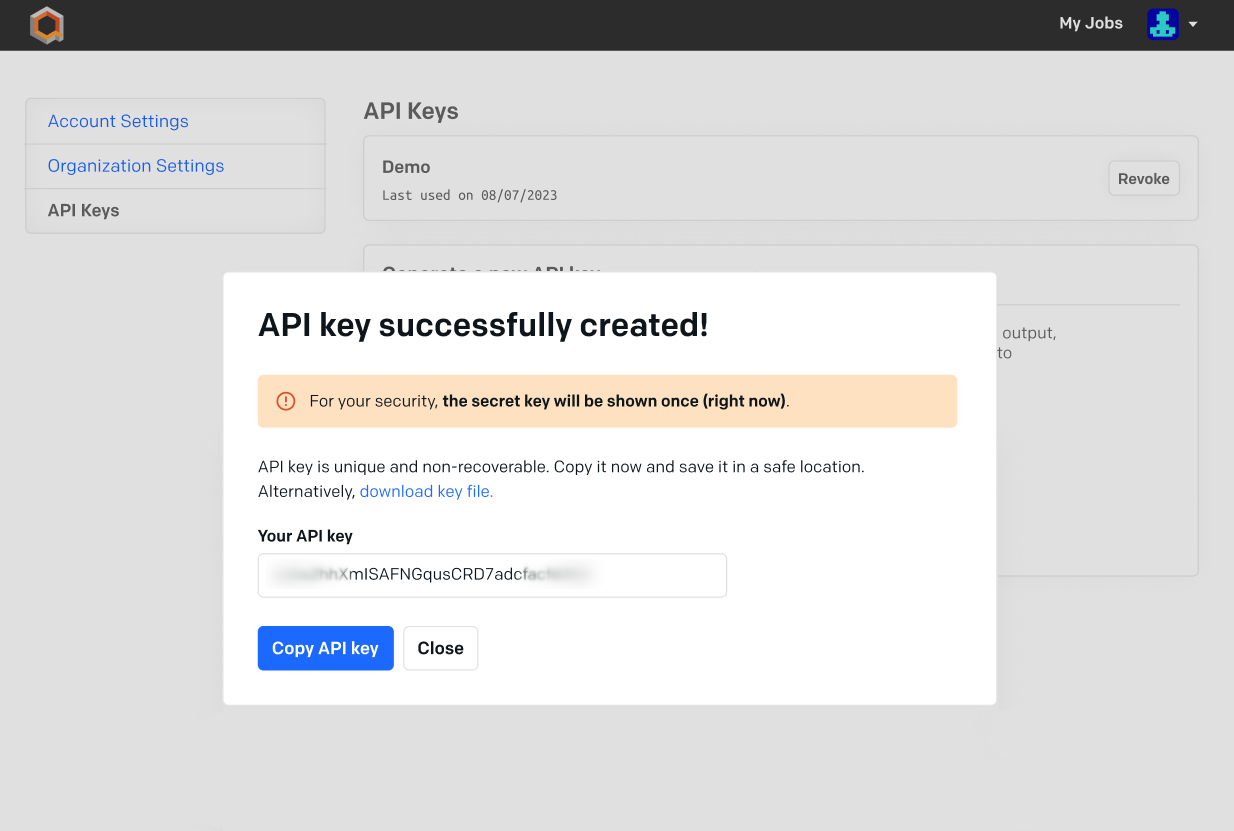
Create new API key
Upon activating the 'Copy API key' button, a confirmation message will appear, indicating that the key is now in your clipboard.
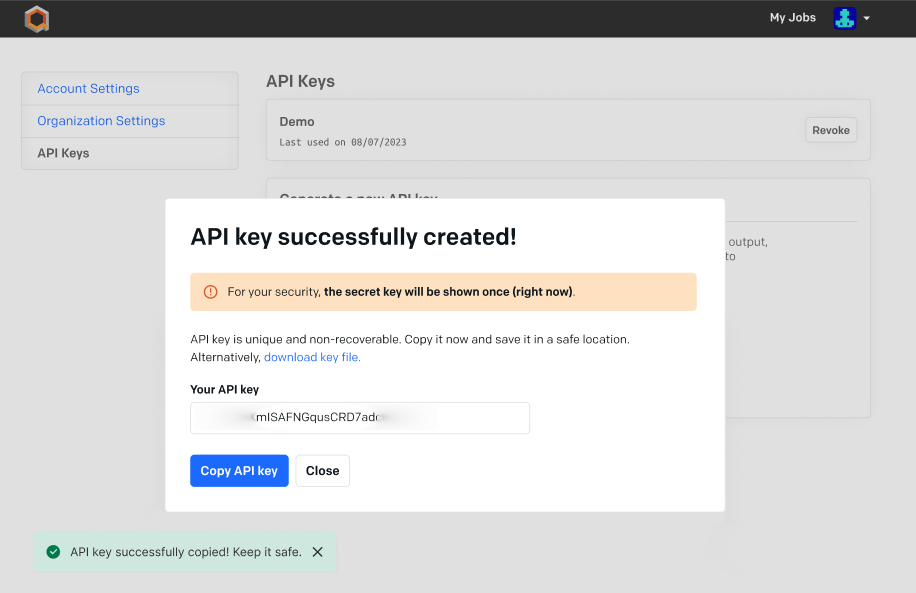
Successful API Key creation
Step two: Store API key as environment variable
An environment variable is a way of storing custom configuration information that you Operating System (e.g. Mac, Windows, Linux) can use with various command line tools.
We'll store your API Key here as an environment variable so that it will be accessible later, whether running curl requests directly from the command line or from a script or Jupyter Notebook.
On Windows OS
Setting up an environment variable on the Windows Operating System can be done in two different ways. First, we'll walk you through the process using the Windows graphical interface. After that, we'll guide you in setting up an environment variable using the Command Prompt. Both ways have the same end result—feel free to pick the option that suits you best.
Set Environment Variable in Windows via GUI
Follow the steps to set environment variables using the Windows GUI:
1. Press ‘Windows + R’ to open the Windows Run prompt.
2. Type in ‘sysdm.cpl’ and click ‘OK’.

Run sysdm.cpl
3. Open the ‘Advanced’ tab and click on the ‘Environment Variables’ button in the System Properties window.
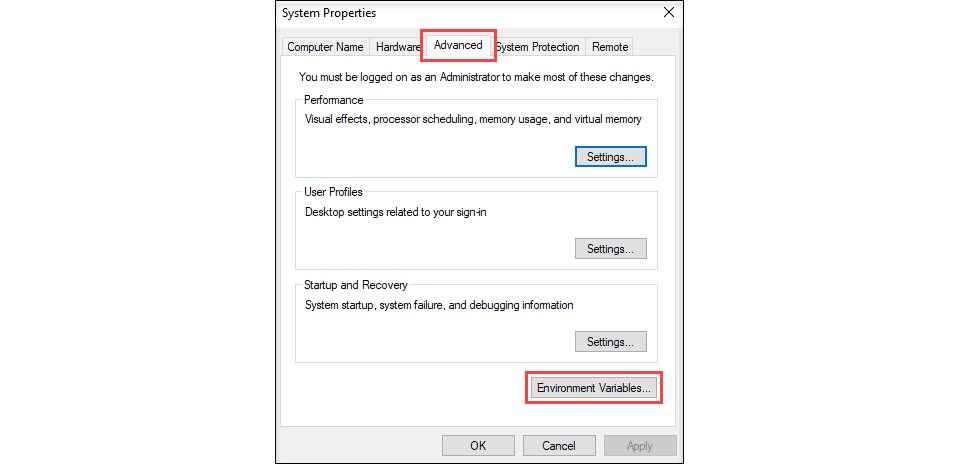
Advanced system properties
4. The Environment Variables window is split into two parts, showcasing environment variables specific to users and those applicable system-wide. To introduce a new variable, simply select the 'New…' button located under the relevant section. The distinction lies in the fact that 'User variables' are exclusive to you, while 'System variables' are accessible to any user on your computer. So, if you're sharing a computer with someone else, perhaps in a lab or a shared workspace, it's advisable to opt for 'User variables' only.
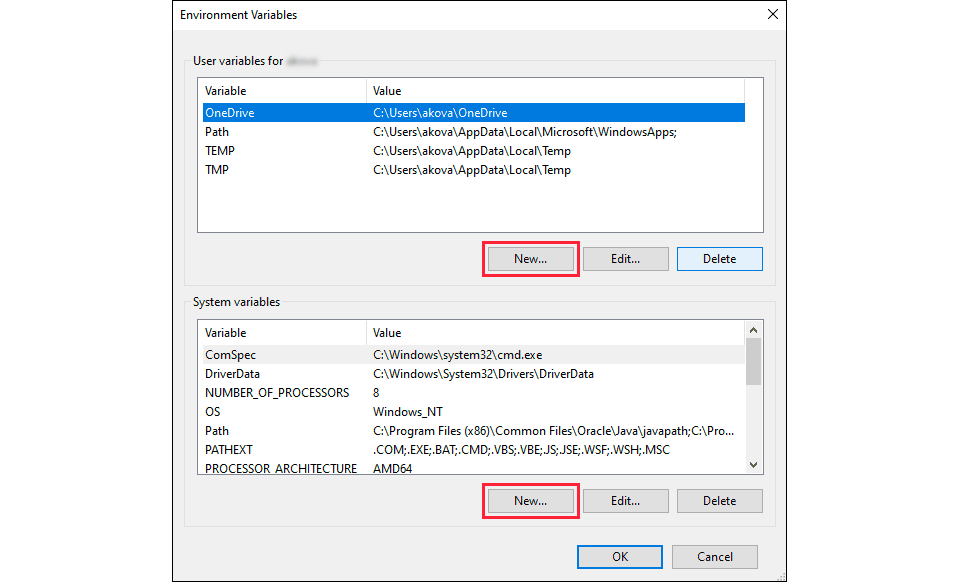
Windows Environment Variables
5. Enter the variable name and value in the New User Variable prompt and click ‘OK’. In our case Variable name can be `IONQ_API_KEY` and Variable value

Set Environment Variable
When working with the environment variable on Windows, you can easily access its value using the `%IONQ_API_KEY%` syntax within your scripts. Similarly, in your Python code, you can make use of the `os.getenv('IONQ_API_KEY')` function to retrieve the stored value.
Set Environment Variable in Windows via Command Prompt
Use the `setx` command to set a new user-specific environment variable via the Command Prompt:
setx [variable_name] "[variable_value]"Where:
- [variable_name]: The name of the environment variable you want to set.
- [variable_value]: The value you want to assign to the new environment variable.
For instance:
setx IONQ_API_KEY "<Insert your IonQ API Key here>"Note: You need to restart the Command Prompt for the changes to take effect.
Incorporate either `%IONQ_API_KEY%` or Python's `os.getenv('IONQ_API_KEY')` in your code to retrieve the stored value effortlessly.
On Linux/Mac
Permanent environment variables are added to the "profile" configuration file of your shell. If you're on a Mac, that file will be called .zshrc (for zsh), while most Linux distributions use .bashrc (for bash).
To add your API key to your profile, edit the following command to suit your needs and run it in your command line:
ls ~/.zprofileAlternately, open your .zshrc or .bashrc in your text editor of choice and add the following line to the bottom of the file:
export [variable_name]=[variable_value]Once added, close your current command line window and open a new one. The "rc" file gets reevaluated every time you open a new terminal, so the new environment variable should be in there now. To test this, try the following command from your command line:
source ~/.zprofileIf successful, you should see your API key printed out as the result.
Now you're all set to employ ‘$IONQ_API_KEY’ for retrieving the key value within your shell scripts. If you're working with Python, you can utilize `os.getenv('IONQ_API_KEY')` to access the value in your notebooks or independent code snippets, but any programming language or framework you work with will have some way of accessing OS environment variables.
Getting help
Having trouble? Seeing something you don’t expect? Have other questions? Reach out to [email protected] or submit a ticket on support.ionq.com.